Hey! Welcome to my Tutorial about WSL and how to develop Linux application with Visual Studio Code.
I'll feature to you a great way to develop your Linux application with a Windows environment.
This environment is configured without dual boot, virtual machine or Docker installed on your system. I'll stay focus on the WSL (Windows Subsystem for Linux) and feature a great way to build your application simply with Visual Studio Code!
You know, I love the Linux environment. However, I am also a regular video game player. The fact is the video game development on Linux is, in my opinion, not yet mature. Of course, great improvement had been done in the last years! But many games work only on Windows.
If like me, you appreciate the Linux environment and Video games, this tutorial is perfect for you!
Let's go!
What is WSL?
Windows Subsystem for Linux (WSL) allows launching a GNU/Linux environment directly on your Windows system. This kind of environment avoids the usage of a Virtual Machine, Docker, or Dual Boot to code on Linux.
The fact is that you'll get access to a Bash CLI directly on your Windows.
One year ago, WLS2 had been announced by Microsoft. WSL2 provides high performant file management plus a complete Linux Kernel compare to WLS1. Don't hesitate to read the documentation!
https://docs.microsoft.com/en-us/windows/wsl/compare-versions
During this tutorial, we'll focus on WSL1.
Activate and run WSL.
Activate WSL.
You can active WSL in the Windows feature panel:
You can also use command-line through the PowerShell:
dism.exe /online /enable-feature /featurename:Microsoft-Windows-Subsystem-Linux /all /norestart
After reboot, you'll be able to install your Linux distribution!
Select and Install your distribution.
For this procedure, you should go to the Microsoft Store
Then, search a distribution name, for instance, Ubuntu:
Then select and install your distribution. For my configuration, I took "Ubuntu 18.04 LTS".
First configuration for a build environment.
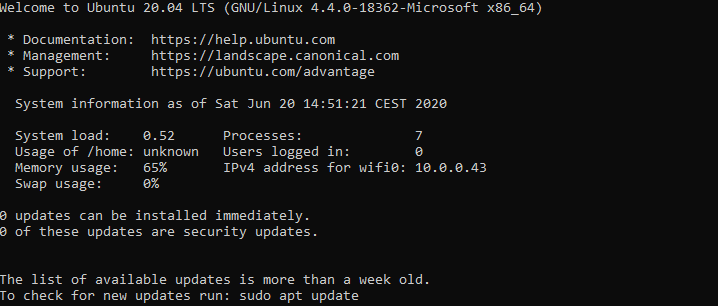
Launch your Linux Distribution like a classic application (Don't hesitate to type in the search bar). For my case, I'll search "Ubuntu"
For the first launch, the environment asks you to configure a username and a password.
The installation of your Linux Environment is minimal. Don't hesitate to installation all the requirements for development.
In my case, I types the following command to install a complete build environment for C/C++:
sudo apt-get install build-essential
Configure Visual Studio Code to develop through the WSL instance
If you reached this step, you should have a complete Linux environment configured on Windows. Moreover, your Linux environment had been configured to build C/C++ program.
Now, let's interface your WSL environment with Visual Studio Code
Visual Studio Code extension installation.
Open "Visual Studio Code" and go to the "Extension" tab. Then, install the extension "Remote - WSL":
When your extension is installed, it is time to launch a Visual Studio Code instance in your WSL environment!
This step is pretty simple:
Go to the "Remote Explorer" tab and select your WSL distribution. Click on "Connect to WSL".
A new Visual Studio Code is opened! This is the one launched inside your WSL instance. Don't hesitate to reinstall your personal extensions, they are compatible!
TIP: You can open a Bash terminal linked to your WSL with the shortcut Ctrl+Shift+ù
A simple Linux program.
I created a very simple C++ program in my WSL instance:
#include <unistd.h>
#include <iostream>

int main() {
    std::cout << "Preparing my sentence..." << std::endl;

    for (size_t i=0; i < 3; ++i)
    {
        sleep(1);
        std::cout << i << "..." << std::endl;
    }
    std::cout << "Hello World!" << std::endl;
}
Now, let's build it with g++ and run the binary!
At this step, you should have an environment able to build and run a Linux application.
Personally, I switched one year ago to an environment with WSL. As I use Linux for my personal development, I didn't launch my Linux Virtual Machine for a long time (excepted for one of my servers running on a CentOs environment!).

