During the last month, I was training my skills about Rust. In my learning roadmap, it was time to start a personal project. I chose to create a "Run-And-Gun"/"Multidirectional shooters "game in Rust, inspired by the classic game" Sheriff".
To implement it in Rust, I should choose a game engine. Fortunately, I found two significant game engines based on Rust:
The two games engines look great. After few analyses, I didn't find a good reason to choose Amethyst or Bevy. They look similar (Amethyst inspires Bevy) and perform both well. Then, I selected the Bevy engine because it looked easier to use.
My game and sources are free and open sources (don't hesitate to clone it or test!). The source code is under MIT license and sprites under Creative Common License. Don't hesitate to check the code on my GitHub!
Another point, the game is available in WebAssembly on the web! You can try it on this webpage (Controls: Arrow to move, Space to fire).
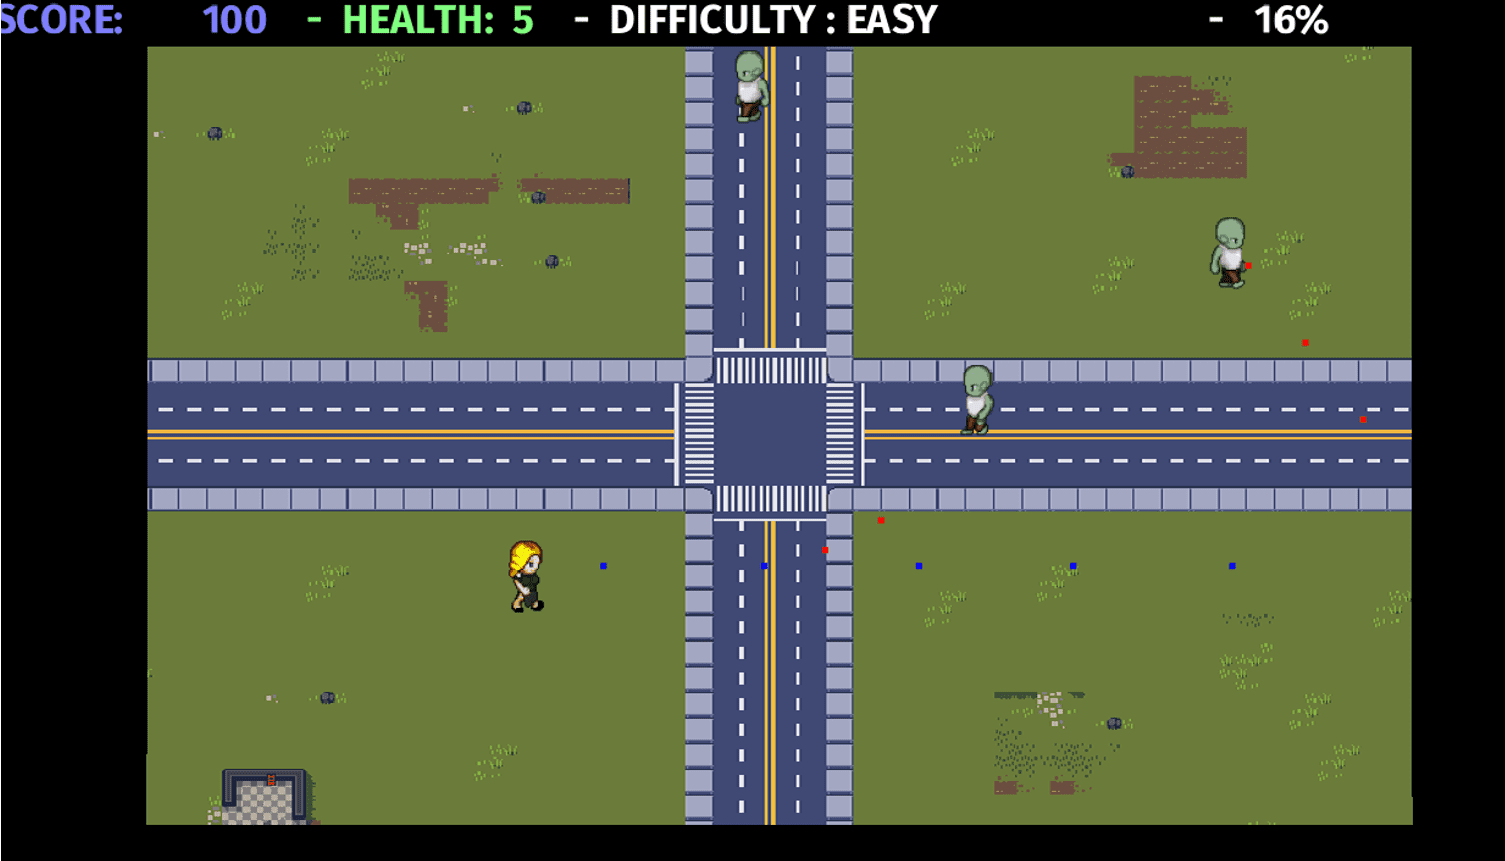
My video game Street of Zombies- Programmed with Rust and Bevy
What is Bevy, a Data-Driven game Engine on Rust
Bevy is a data-driven game engine free and open-source (license MIT). The engine has many features that convinced me to use it:
- 2D and 3D features
- Sprite managements
- Modular with plugin management.
- Event handling
- Sound system.
- Multiple Render Backends such as Vulkan or DirectX12
- Multiple targets (Linux, Windows, Android, Web).
All around Bevy, there are multiple Third-P plugins developed by several contributors. In my case, I used the bevy_webgl2 to support the rendering in a wasm target! Other Third-P plugins are available, such as a ".tmx" support (a file format generated by tiled, based on XML).
Now let's talk about my game! Street Of Zombies
As I said in the introduction, I created a game based on the classic game arcade by Nintendo, "Sheriff".
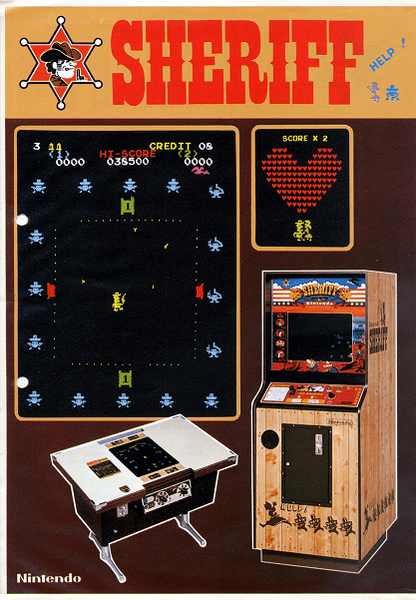
Sheriff - A run&gun arcade game. By Nintendo
The game principle is simple: The player moves on a game arena in four directions. The goal is to avoid the projectiles fired by the "bandits" on the border. To win, the player should eliminate all of them like a classic "Space Invaders". It was my main inspiration, but I completed the game with other features:
- The enemies will spawn randomly on the game area.
- Multidirectional (usage of diagonals).
- Like "Risk Of Rain", the difficulty level increase with time.
- When the difficulty increase, enemies spawn more frequently.
- As there are too many zombies, the player can't win. The goal is to eliminate the maximum to get a great score!
I also had other ideas, such as weapon management (multi-shot fire, camera movement). However, I didn't take the time to implement those ideas as the game is playable right now. Maybe a next time?
How did I begin? My starting point.
As I have no experience in game development (Excepted in some projects in schools), I checked the examples provided by Bevy. One of them was a great source of inspiration thanks to its 2D format and movements: The breakout.
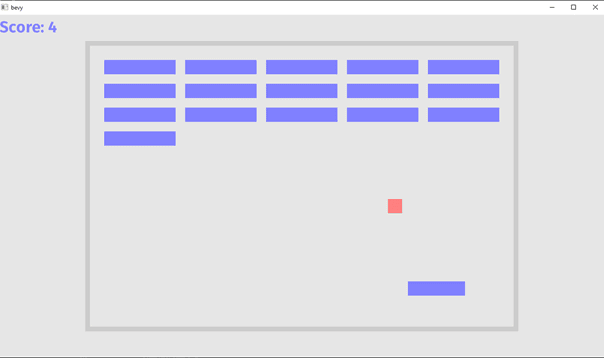
The breakout game featured the Bevy's example.
I used the system to move the "pad", and I adapted it for my player. Then my first function, "keyboard_capture", was created with few modifications to support "diagonal movements". I started a new trait, "MoveableSprite", which represent a "Moveable entity" with three main variables:
- The "Position on the map" is represented by a tuple (x, y)
- The "Direction Factor" is represented by a tuple (x, y) representing the entity's direction.
- "The Speed", a coefficient linked with the "Direction Factor", which "accelerate" the movement.
- Then, complete with initial position, then hitbox size later for feature purpose.
Now, let's modify the sprites, and I obtain the beautiful squares to test my movements:
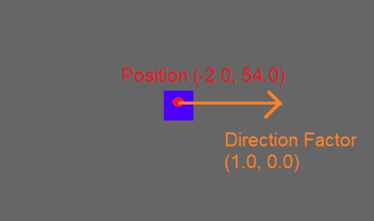
How a "Moveable" 2D sprite is represented in my game
Now, let's use those "MoveableSprites" to create my enemies and projectiles.
My error in Rust: The inheritance mimic based on "Trait."
It is where I made my worst error: The usage of a trait for the moveable sprites. I quickly featured this error during one of my previous posts concerning design patterns on Rust.
By defining the "Trait", I re-implemented the methods to retrieve and set the speed, direction, and position of the entity for each structure: "Player", "Enemies", and even "Projectiles"! I copy the same code, the same test and the same documentation for all structures. Something is wrong!
First, I was slightly concerned about this. But quickly, when I added the "Hitboxes", "Initial Position", and others, the code started to smell, and I was overwhelmed by my mistake!
I created this trait like an inheritance in an OOP language.
As I described previously, the consequences were terrible.
The solution is a traditional good practice for OOP language: Prefer the inheritance per interface. I transformed the "MoveableSprite" trait into a simple "Struct" and moved my "movement methods" inside it. Then, the code was more straightforward and more efficient!
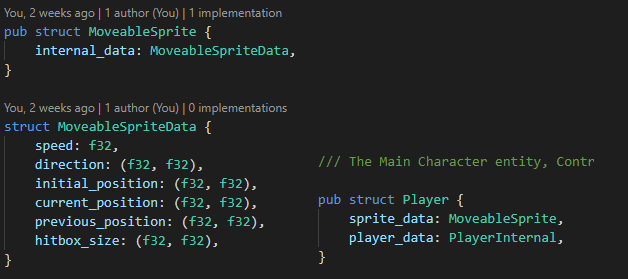
Inheritance per interface for a "Player" structure. Player can access to MoveableSpriteData
The projectile and weapons management
The following things are more anectodical. I will summary one of the Bevy add values in my project with the projectile movement and collision systems.
"Projectiles" are managed by "Weapons", a structure that regulates the fire rate, the number of Amo, and the time to reload the weapon (valid for the "enemy AI", which has a cooldown between each burst of fire). Each entity Player or Enemy contains a Weapon.
Concerning the projectiles movements, Bevy plays its part gracefully by using two "Bevy" systems based on projectiles. Those two methods are directly managed and called by the game engine!
Projectile movement.
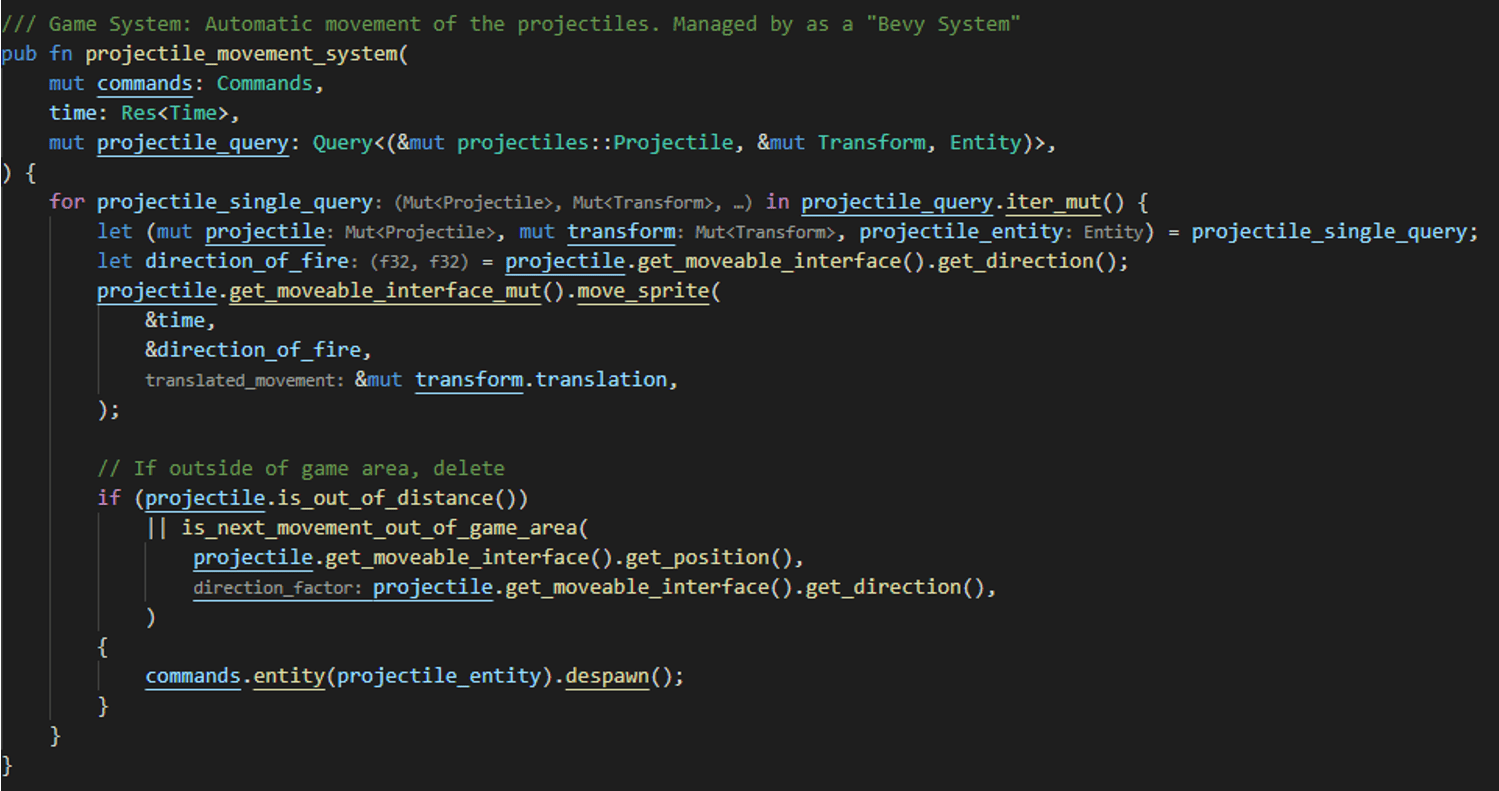
The movement system. Based on a "Bevy" call.
The system is the following: Each projectile created contains an "ID" created by Bevy. Thanks to those IDs, Bevy select a set of data where are collected:
- The projectile structure. It contains all data concerning the position and projectile type (from Player or Enemy).
- The sprite position and "transform" variable to move the sprite
- An "Entity" that represents the set of "objects" in Bevy. This entity is helpful to delete the complete object when the projectile reaches a "Wall"!
When a weapon fires a projectile, all those data come from this single "ID".
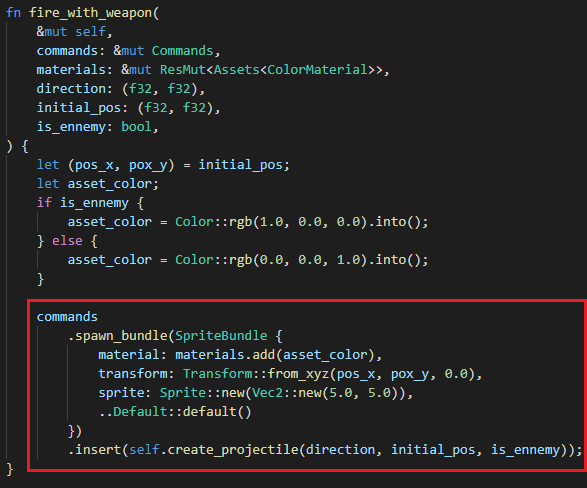
The method from "Weapon" which fires a projectile. The red frame represents the creation of a projectile on Bevy.
The collision system.
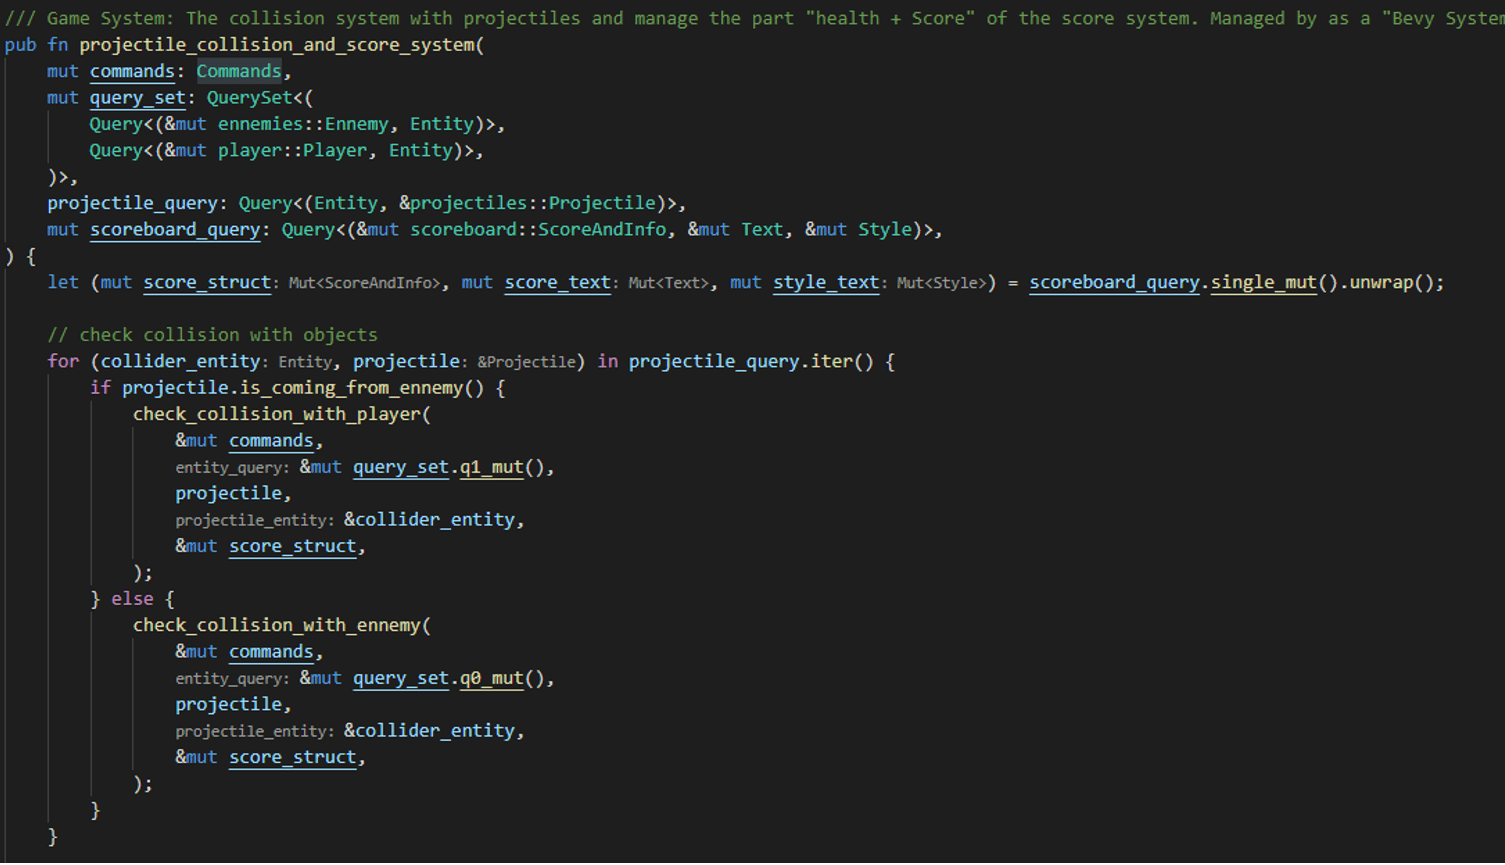
This part is executed by "Bevy" frequently. It checks if a "projectile" hits a Player or an Enemy hitbox.
Here, the collision system is a loop that retrieves all my projectiles all around the game area.
For each projectile, I match with the "Player" or list of "Enemies" (following the type of projectile) to check if there is a "Collision". The collision is detected thanks to the "Moveable Sprite" structure where the position and the "hitbox size" is contained. A "collision" gears an update of the Scoreboard (Player Health/Score) and the enemy structure (Enemy health/Enemy destruction if life equals 0).
Now, I have a prototype where a player launches projectiles on a single enemy.

The prototype of my game! Player and Enemy move. Projectile and collisions, OK!
Let's continue to code!
- Enemy spawn, OK.
- Enemy fire LOOKS GOOD.
- Scoreboard, COMPLETED.
- Pipelines, documentation and Unitary Tests. ON THE WAY!
Time to complete: 2D Sprite animation
Now, my "Game System" is complete. It is time to make up the game! As I have few talents in graphical design, I looked for free sprites only. Fortunately, I found Sprites under Common Creative License (a huge thanks to the contributors!) that are beautiful. I modified and merged the format for my blog:
An example of SpriteSet from my game "Street Of Zombies"
Now that I have my sprite sets, I cut them per line and columns with Bevy. The management of 2D sprites is logical and user friendly! All the sprite management is in my file "sprite_management_system.rs". I enumerated the texture available (one for the player, one for zombies). Then, I generate the sprite on the map after a "Player" or "Zombie" creation. This process keeps the "Sprite" in the same Bevy "ID" to encapsulate resources.
The sprite is created with a "SpriteSheetBundle" from Bevy.
My sprite is selected and loaded from this function.
My sprites are now generated and created in the game area. Unfortunately, they are not yet "Animated", and the game looks static.
The next step is to create another "Bevy system" dedicated to the sprite animation. Fortunately, sprites with "Player" nor "Enemies" structures are together in an indivisible "Bevy ID". Then, an "animate_sprite" method can be called with the object "MoveableSprites" to determine "Where the entity is seeing" thanks to the "Direction Factor"!
I complete this task with a timer that changes the animation on a single "Row". If the direction changes, the Sprite Set "Cols" switches to the corresponding one thanks to the "TexturePositionEnum"!
Animation of the sprites in my game "Street Of Zombies".
Great, now the game is completed and animated:
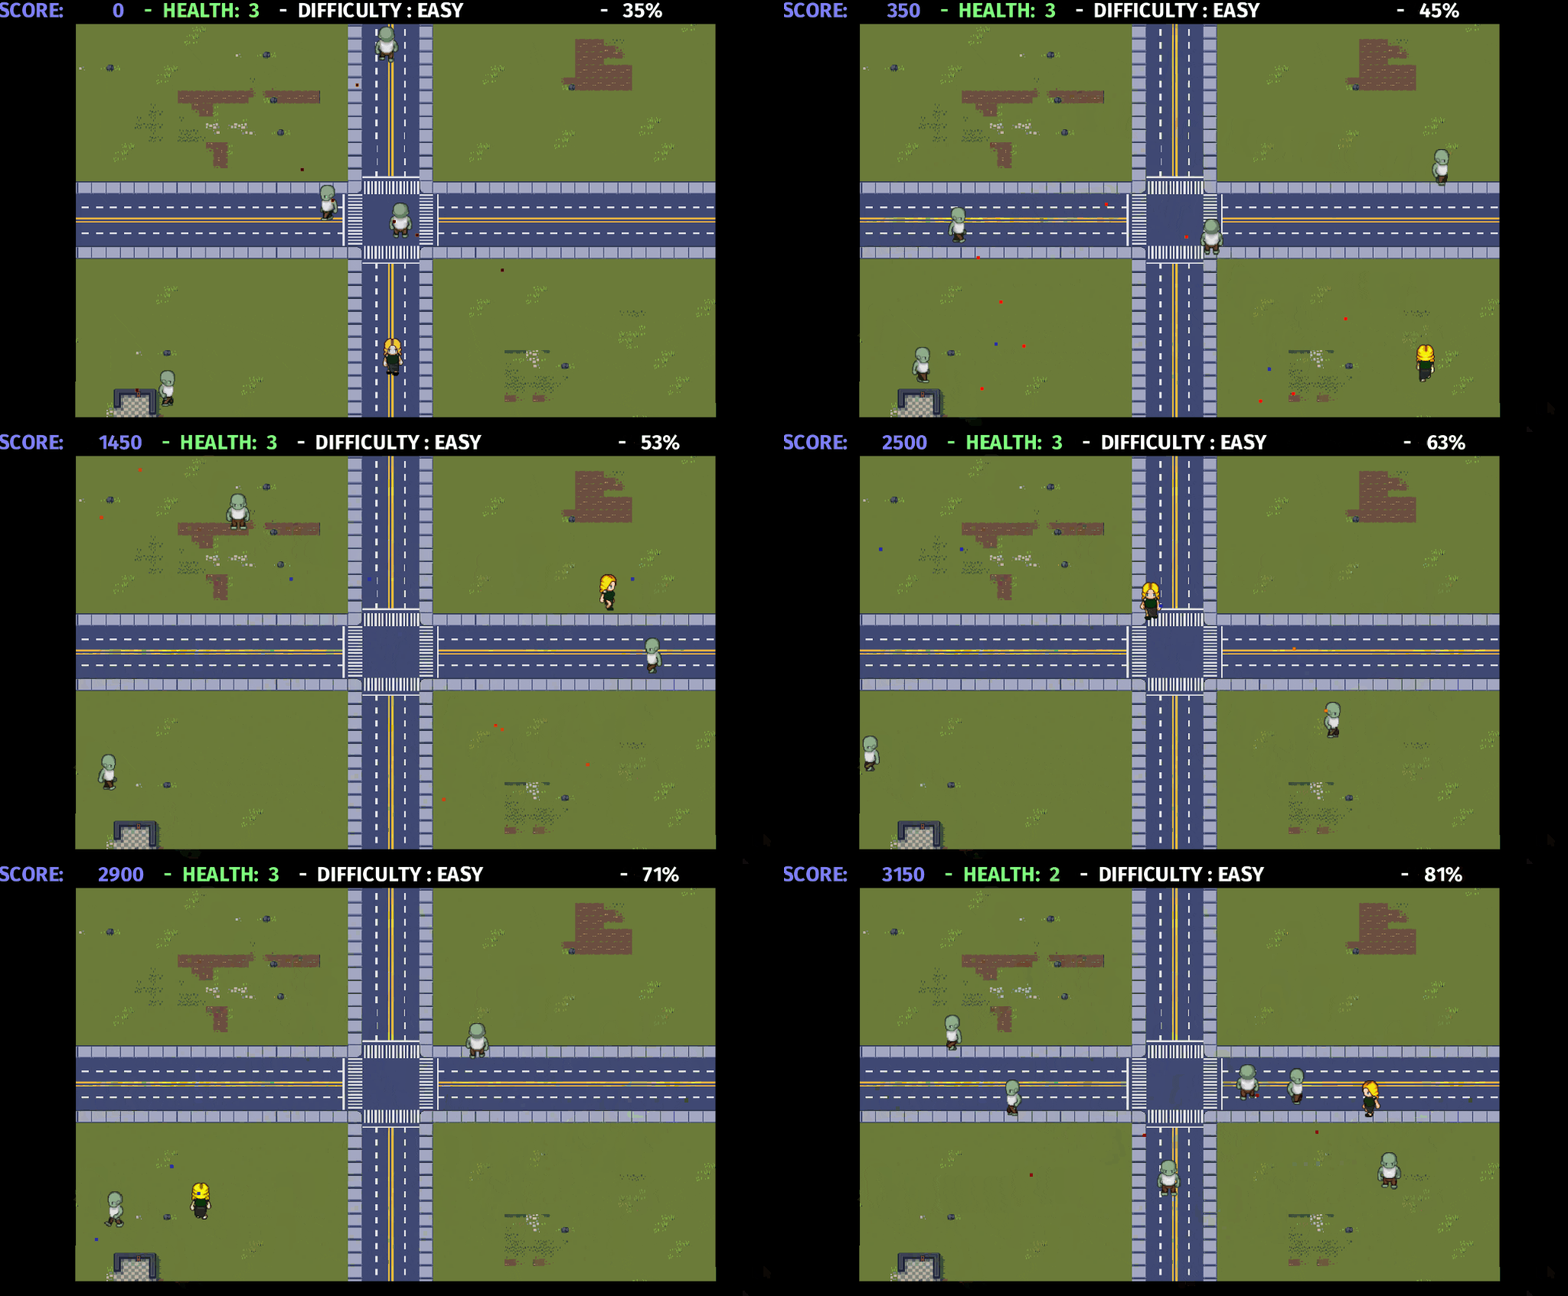
The game is running!
Extra: WebAssembly with Bevy – Deploy on the Web
Now that the game is complete, it is time to enlarge the deployment of the game. Currently, it only supports Windows, Mac, and Linux.
After a few research, I saw that Bevy could be deployed in WebAssembly to produce a code integrable in the web.
Fortunately, I found a great and precise tutorial in the unofficial Bevy book! As my game doesn't use audio, I focused on graphic rendering. The principle is the following:
Replace the "WebGPU" official rendering with an unofficial one supporting deployment on a Web Page: bevy_webgl2.
After that, the book proposed two solutions to deploy my application: use "wasm-pack" or "Cargo Make". I choose "Cargo Make" to ease the deployment of my application (it requires more configurations, but the process is automated!). This process needs a kind of "Makefile" dedicated to cargo.
Finally, I modified my "cargo.toml" file to support a "Native" or "Wasm" configuration. The last complicate situation was the "Random Number Generator" support, which required an extra configuration in wasm. Fortunately, the book explained the procedure to use the "getrandom" crate with the "js" feature!
Optimizing Web Assembly and deploy on GitHub Page
Wasm format should be the smaller possible to accelerate the browser downloading. I choose two solutions that are not intrusive in my build process:
- Optimize the memory allocation with "wee-alloc", a memory allocator optimized for wasm. It is slower but optimized for size.
- Optimize the build by size and use the link-time-optimization.
Although my "wasm" file is large (~10Mb), it is better than the default version (~12Mb). This process is not the optimized one, but it automated my build optimization and deployment.
Deploy on GitHub Page
Now, let's talk about the deployment with "Github Pages". Initially, "Github Pages" are used to hosting project pages on a GitHub repository. I created a new empty branch, "web".
This branch will contain all the files to deploy my game on the web. It concerns a javascript file, an index.html and the wasm of my game.
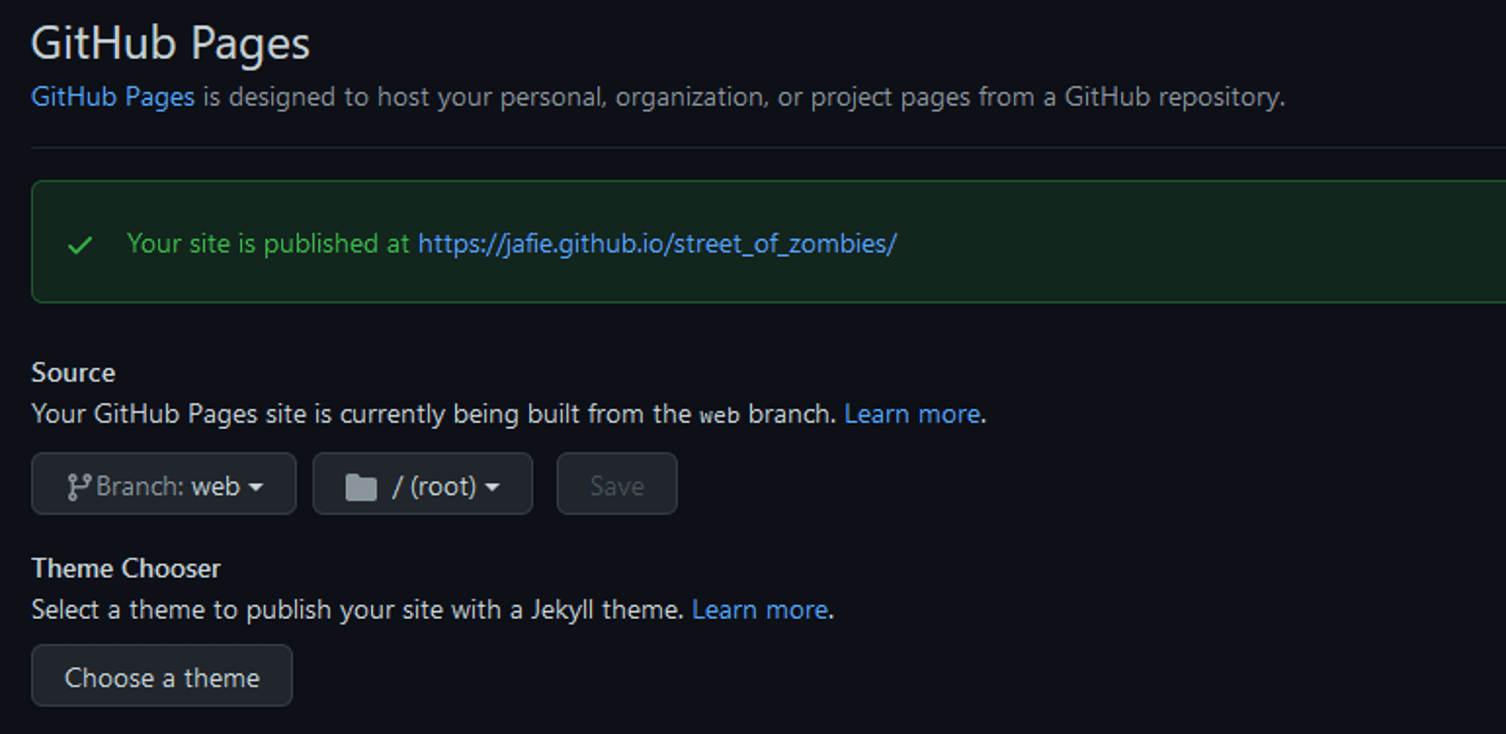
My Github page is created!
To continue and my opinion.
During this personal project, I was happy to start game development. Although I don't have any experience with Game Engines, Bevy was intuitive to use. Sometimes, the documentation is not complete, but overall, the performance was significant and user friendly!
I think I made some errors concerning a game structure or usage of a game engine. I only touched the surface of Bevy and didn't expect the impressive number of features I didn't use, such as the UI, scenes, sound, and other features through the Data-Driven system.
Moreover, even if I considered the game as completed, it could support multiple weapons or enemy types. Last, there are no sounds implemented (It is maybe a chance 🙂 ).
Bevy is still in development, but the state of the art is promising for the next steps. It looks like a new version (0.6) is in progress with multiple new features and bug fixes, such as the Android support.
Later, I will choose Bevy again to develop another game. This time, in 3D!
I recommend this engine to initiate a game in Rust! It is promising for the future!
